
After spending 4 months in the hospital and having to endure countless hospital meals I was looking for something super tasty. Enter Oysters Rockefeller. After searching for traditional Osyters Rockefeller recipes and keeping with my belief that everything tastes better cheese I decided on a buffalo blue cheese Oysters Rockefeller. Take a deep breath. Breathe! I know, it sounds overwhelming and it should because these little gems are heaven right here on earth. I kid you not.heaven. These beauties are great for any celebration and they totally hit the spot.
Recipe:
12 freshly shucked oysters
1/2 cup breadcrumbs (I used corn flake breadcrumbs and highly recommend them if you can find them)
1 tablespoon parsley, minced
1 tablespoon celery leaves, minced
1 teaspoon green onions, minced
1/4 teaspoon garlic, minced
1/2 teaspoon lemon zest
1 teaspoon butter, melted
1/2 teaspoon black pepper
1/4 teaspoon salt
blue cheese
Directions:
1. Preheat the oven to 500 degrees.
2. Shuck the oysters and save as much of the liquid as possible. Keep oysters on the largest of the half shells.
3. Place all of the ingredients except the oysters and blue cheese in a bowl and mix thoroughly.
4. Cover the oysters equally with the breadcrumb mixture.
5. Crumble about 1 teaspoon of blue cheese over the breadcrumbs of each oyster.
6. Place the oysters on a baking sheet trying to make sure that they stand upright.
7. Place the oysters in the oven and bake for 6-8 minutes, depending on your oven until the breadcrumbs are golden brown and the cheese has melted.
8. Serve with buffalo hot sauce and lemon wedges.
Showing posts with label seafood. Show all posts
Showing posts with label seafood. Show all posts
Friday, April 22, 2011
Blue Cheese Oysters Rockefeller

Wednesday, January 5, 2011
Panko Breaded Shrimp with 3 Dipping Sauces
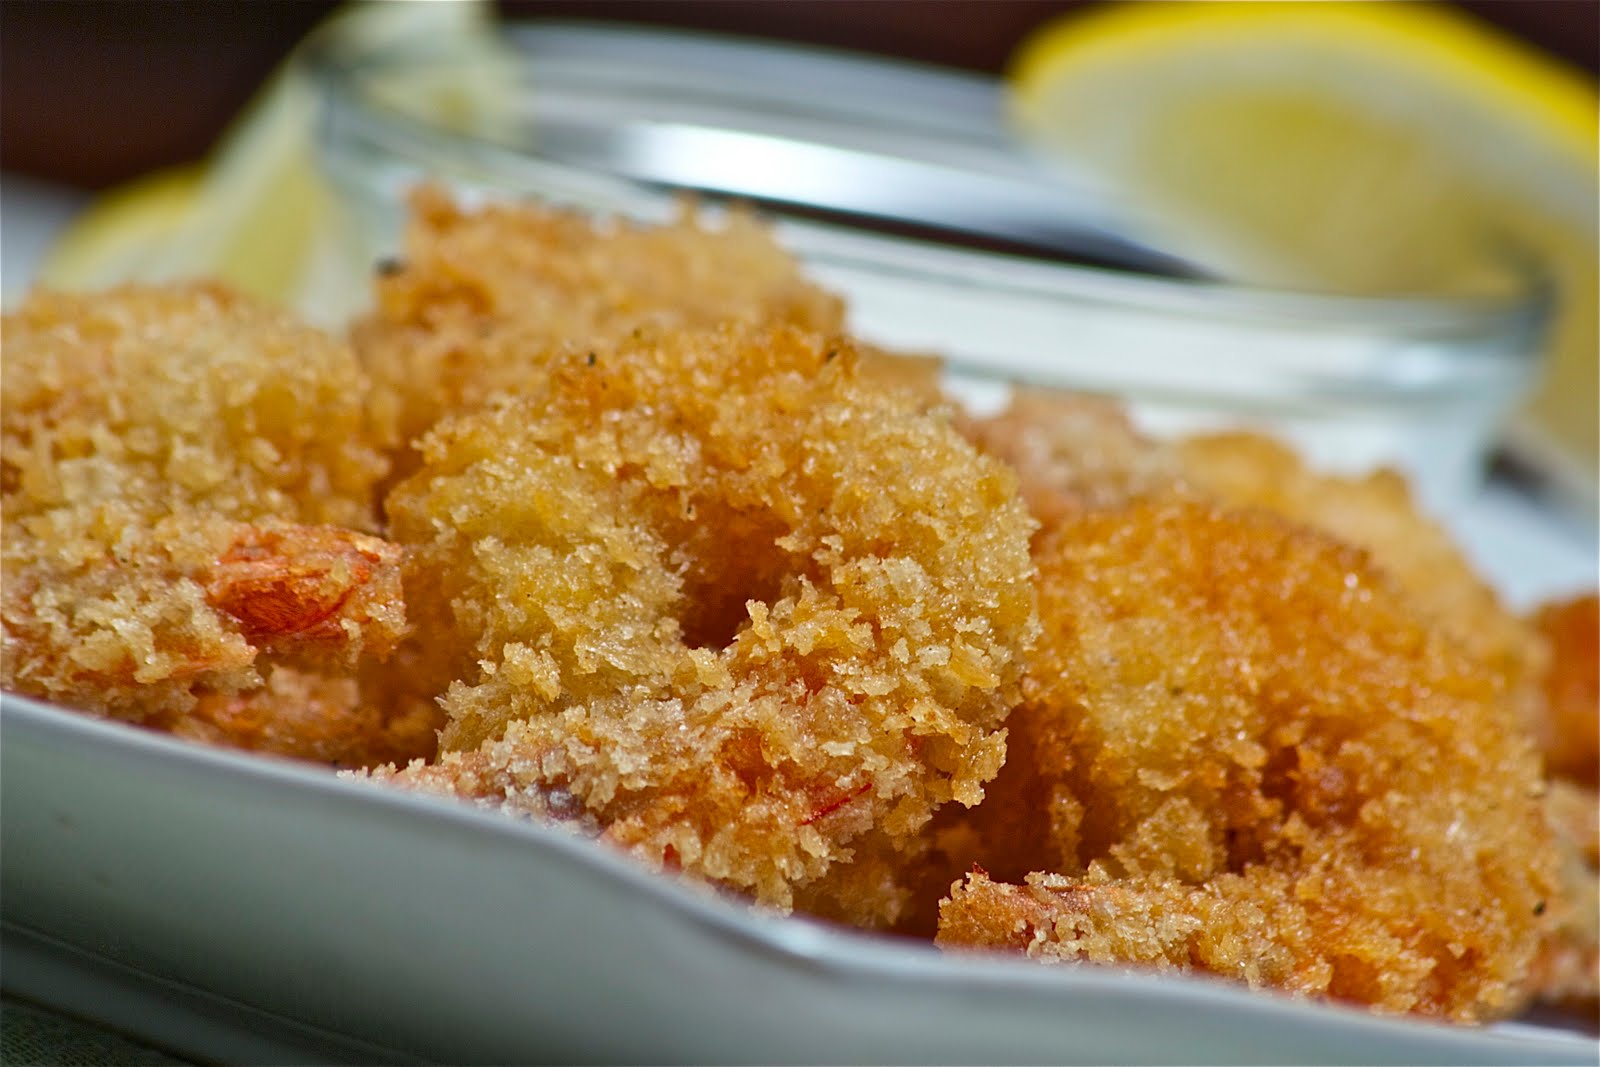
I don't make New Years resolutions because quite frankly, I don't like the pressure and when I tell myself I can't have something, I want it even more. That last quality does not exactly coincide with my major lack of will power especially with guilty food. So while I make myself eat healthy most of the time, when I want something good, I'm gonna have it. And it most often includes something deep fried. Now these shrimp, ooooh baby, these shrimp rock my world. They're sweet, crunchy, juicy and totally hit the spot. When I make them I fry up a large batch and serve them with my 3 favorite dipping sauces (I can never just pick one). That's another of my bad qualities - indecisiveness. But one thing is for sure, I never have to think twice about indulging in these beauties.
Recipe:
20 large shrimp, deveined, cleaned and shells removed leaving the tails on
1 cup flour
1 teaspoon salt
1/2-1 teaspoon black pepper
2 eggs
1/2- 2 cups Panko breadcrumbs (can use regular dried breadcrumbs but they won't be as light and crisp)
1 quart oil for frying (such as vegetable, peanut or grapeseed
Lemon wedges, for garnish
Directions:
1. Heat oil in a deep, heavy pot or fryer on stove. Oil should be 3-4 inches below the top of the pot. Heat oil to 375 degrees.
2. As if working in an assembly line, In one bowl mix the flour, salt and pepper. In another bowl add the eggs and beat lightly. Put the bread crumbs in a third bowl. Working in batches, dredge the shrimp in flour and shake off excess, dip the shrimp in the egg again shaking off excess, then into the bread crumbs to coat thoroughly. When you have 6 breaded add them to the hot oil making sure not to crowd the pan. Let them fry, turning once, until golden brown about 3-4 minutes per side. Remove with a skimmer or slotted spoon. Put on a wire rack lined with paper towel with paper towel and repeat with the remaining shrimp.
Dipping Sauces:
1. Chili Mayo:
1/2 cup mayonnaise
1 teaspoon chili sauce such as sambal oleck (more or less to taste)
1 teaspoon lemon juice
Mix all ingredients together and refrigerate until needed.
2. Homemade Cocktail Sauce
3. Sweet Chili Dipping Sauce
Thursday, November 18, 2010
Baked Shrimp Scampi

Oh hello there Shrimp Scampi, my new favorite best friend forever. Yes, I know my BFF quotient is rather fleeting and changes at an extremely rapid rate but for now, this dish has me weak in the knees and looking for cover. It's garlicky, buttery, cheesy, herby (is that a word?) goodness. I'm so happy with this dish I feel like breaking into a verse of killing me softly.
Shrimp Marinade:
2 lbs shrimp, shells removed but leave the tails on, cleaned and deveined.
3 tablespoons olive oil
1/4 cup white wine
2 tablespoons lemon juice
1/4 teaspoon each salt, pepper and red pepper flakes
Directions:
whisk all of the marinade ingredients together in a large bowl. Place the shrimp in the marinade and stir to combine. Allow the shrimp to marinade at room temperature for 15-20 minutes.
Scampi Recipe:
1/2 cup butter, room temperature
3 cloves garlic, minced
1 cup breadcrumbs
1 egg yolk
1 teaspoon rosemary, finely chopped
1/4 cup parsley, finely chopped
zest of 1 lemon
2 tablespoons parmesan cheese
Directions:
1. Preheat oven to 450 degrees.
2. Melt the butter in the microwave. Remove, add the minced garlic to the butter and set aside to cool.
3. mix the breadcrumbs with the rosemary, parsley, lemon zest, parmesan cheese and egg yolk. Add the cooled butter mixture to the breadcrumbs and stir everything together.
4. Remove the shrimp from the marinade and place the shrimp in a single layer in a large casserole dish. Drizzle the shrimp with the remaining marinade. Spoon the breadcrumb mixture over the shrimp. Place the shrimp in the oven and bake for 10-12 minutes or until the shrimp are pink and the breadcrumbs are golden brown. Serve with fresh lemon wedges.
Saturday, July 24, 2010
Crab and Shrimp Croquettes

The other day I found myself with leftover crab and shrimp. I know you're thinking, "how in the h-e-double-hockey-sticks do you end up with leftover crab?" But allow me to explain before I'm sequestered to exile island. We had ourselves a "seafood extravaganza" and man, did we go all out. I'm talkin' oysters, shrimp and crab. And lots of it. I mean, we ate our weight in seafood that night and we still had leftovers. So I began my search for something new to do with the leftovers and during my search I kept coming across croquettes. I love croquettes, my Mom used to make them often when I was growing up. How could you not love them, they are simply deep fried goodness. Seriously my friends, they are delicious. Just imagine sweet crab and shrimp all wrapped up into bite sized awesomeness. They are a perfect appetizer or as a light dinner. It's times like these when it's fun to have leftovers.
Recipe:
1 cup cooked crab*
1 cup cooked shrimp (about 16 regular sized shrimp), finely diced*
1 scallion, finely chopped
1 small red thai chili, finely chopped
2 tablespoons mayonnaise
2 tablespoons cilantro, finely chopped
1/2 teaspoon lemon zest
1 egg, lightly beaten
1/4 cup bread crumbs, plus more for dusting
peanut, vegetable or grapeseed oil for frying
Directions:
1. In a large bowl gently mix together all of the ingredients until they are combined. Stir in flour and eggs. Transfer the mixture to a storage container and refrigerate for 2 hours.
2. In a large heavy bottomed pan, add oil 1" deep. Heat over medium heat until a deep-frying thermometer inserted in the oil reaches 360 degrees F. (If you don't have a thermometer, a cube of bread will brown in about 3 minutes.)
3. Remove the croquette mixture from the refrigerator and shape into 1/2-inch to 3/4-inch thick patties and coat with breadcrumbs.
4. Add the croquettes to the hot oil, working in batches if necessary to avoid crowding the pan, and fry until golden brown on both sides, about 3-4 minutes per side. Once browned on both sides, remove the croquettes from the oil using a slotted spoon and drain on paper towels. Season with a light pinch of salt while still hot. Serve with Garlic Aioli.
*NOTE: If you are starting with raw crab and shrimp, de-vein the shrimp but leave the shells on. Bring a large pot of water to a boil and add the juice of 1 lemon. Add the crab and shrimp to the boiling water, cover, reduce the heat to low and steam the crab and shrimp for 1-2 minutes, just until they become pink. Remove them from the water, allow to cool and remove the shells.
Monday, June 7, 2010
Simple Steamed Spot Prawns

It's that time on our beautiful B.C. coast for spot prawns. B.C. spot prawn season is a short one and generally lasts from early May to July. If you happen to find yourself upon these wonderfully sweet and succulent gems I urge you to snap the little suckers up like no one's business.
When you come across something as gorgeous as spot prawns it's only fair to prepare them with the respect they deserve. As in super simple, allowing their true flavours to shine through. Case in point this recipe calls for just a few ingredients to make the spot prawns shine even more. Not that they need any help.
Recipe:
1 lb spot prawns
1 clove garlic
1 small red chili, seeds and veins removed and chili finely chopped
1 small lemon, juiced
olive oil
1 tablespoon butter
Directions:
1. Heat a skillet to medium heat, add oil and heat the oil. Add the garlic and chili and saute 2-3 minutes, making sure the garlic doesn't brown. Add the lemon juice and butter, mix together. Add the spot prawns, cover the pan and steam the prawns for 5-6 minutes. Serve the prawns with the pan juices and plenty of bread.
Sunday, May 30, 2010
Southern Fried Catfish

I had never had catfish before so I was excited to come across it at the fish monger the other day. Seeing as how this was my first experience with it I figured something simple was in order so I could get the true flavour of the fish which turned out to be mild and sweet. After a little google action it was clear to me that although blackened is a popular choice, for my first time Southern fried was the way to go.
After trying this recipe it was no wonder why there are about a million recipes for Southern fried catfish. They are all pretty much the same so I thought who better to listen to than Southern home girl herself, Paula Deen. She had me at Old Bay. Here is her recipe for a quick, simple and delicious fried catfish.
Recipe:
4 catfish fillets (6 oz each)
Old Bay seasoning
salt
2 cups flour
1/2 cup cornmeal
oil for frying, such as peanut, grapeseed or vegetable
Directions:
1. Heat a fryer or a deep pot halfway filled with oil to 350 degrees.
2. Sprinkle both sides of each catfish with salt and old bay seasoning.
3. In a separate bowl, combine the flour and the cornmeal. Dredge the catfish in the flour mixture and place in fryer. Deep fry for approximately 7 to 8 minutes until golden brown. Drain on paper towels.
Sunday, April 18, 2010
New Orleans BBQ Shrimp

I'm not exactly sure why this recipe is called BBQ because it's anything but. However, when something tastes as good as these shrimp it's best not to question anything about it. This shrimp dish is essentially a run down of just plain goodness. Indulgeance at its finest. It has all the makings of a winner; spicy, rich, tart and the sweetness of the shrimp pull this recipe together perfectly. Don't be afraid of the butter, it's only for tonight. And most importantly don't forget to serve this dish with some crusty bread to sop up all of those wonderful juices.
Recipe:
2 lbs shrimp, shells on but deveined
1/2 cup butter
1/3 cup white wine
1/2 cup worcestershire
1 lemon, sliced into 1/4" rings
1 clove garlic, minced
1 teaspoon tobasco, plus more to taste
1/2 teaspoon black pepper, plus more to taste
1 teaspoon salt
extra virgin olive oil
Directions:
1. Preheat oven to 475 degrees.
2. Combine everything except the shrimp, olive oil and the lemon slices in a saucepan. Bring the sauce to a simmer and cook for 5 minutes.
3. Butter a large casserole dish (big enough to fit the shrimp in a single layer) and place the shrimp in the dish. Place the lemon slices on top of the shrimp.
3. Remove the sauce from the heat and pour the sauce over the lemons and shrimp. Place the dish in the oven and cook 5 minutes. Remove the dish from the oven, flip the shrimp and cook 5 more minutes. Serve with crusty bread, a sprinkle of chopped parsley if you have it, a good drizzle of olive oil and fresh lemon wedges.
Serves 4
Monday, April 12, 2010
Pan Seared Halibut with Asparagus Puree and Chive Oil

It's Spring, it's fresh and it's my favorite season for so many reasons. Sure it's been raining and muddy and outrageously windy here for the last two weeks but I don't mind at all (actually I find high winds quite disturbing but that is a whole other story). Not when my tulips, crocuses and cherry blossoms are blooming. The refreshing aroma of new is intoxicating to me and don't even get me started on Spring cuisine. Okay, I was started way before I was even started. Spring brings us beautiful vegetables like mushrooms, radishes, artichokes, peas and asparagus, oh and my chives are happily growing with a vengeance. Not bad, right? It also brings us halibut. One of my favorite fish, halibut is widely versatile and it's also a hearty fish. It can stand up to many flavours whether they be mild or intense but in celebration of this wonderful season my favorite way to prepare halibut is light and simple. This pan fried halibut with asparagus puree is a perfect seasonal dish for Spring.
Recipe:
2 halibut filets aproximately 1" thick
1/2 lb asparagus, woody ends removed, cut asparagus into 1 " dice
1 small shallot, finely diced
1 small rib celery
1/2 cup chicken stock
1 teaspoon butter
1 teaspoon olive oil
salt and pepper
Directions:
1. Coat the bottom of a saucepan with oil heated to low-medium. Add the shallot and celery and saute for about 8-10 minutes or just until they are softened. Remove from heat and set aside.
2. Meanwhile, bring a large pot of water to a boil. Season the water with a pinch of salt and add the asparagus. Boil the asparagus for 1 minute, strain the asparagus and immediatley place in ice water to cool. Once cool, strain the asparagus and place in the blender along with the sauteed shallot, celery and chicken stock. Puree the mixture until nice and smooth. Season with salt and pepper to taste.
3. Rub your fingers across the halibut to make sure there are no bones. Season with a sprinkle of salt and pepper. Heat butter and oil in a heavy bottomed skillet to medium high. If you have a cast iron skillet this would be a perfect time to use it. Once the oil/butter is hot, place the halibut in the pan skin side down. Cook for 3-4 minutes. Gently flip the fish and cook another 3-4 minutes.
4. Gently reheat the asparagus puree and serve along with the halibut with a generous squeeze of lemon and a drizzle of chive oil Recipe for Chive Oil is below).
Chive Oil Recipe:
1 bunch chives (should equal about a handful)
1/3 cup extra virgin olive oil
pinch of salt
Directions:
1. Bring a small saucepan of water to a boil, season the water with a pinch of salt. Place the chives in the boiling water for 10 seconds. Remove the chives and place in a bowl of ice water. Remove the chives and pat completely dry.
2. Place the chives in a blender or food processor on high. Lightly drizzle the oil into the processor and process until the chives are blended with the oil.
3. Allow the chives and oil mixture to sit for at least an hour. After that time, strain the oil through cheesecloth.
Store the oil covered in the refrigerator for up to a week.
Serves 2.
Sunday, February 7, 2010
Buffalo Blue Cheese Oysters Rockefeller

It's game day! That's right, Super Bowl Sunday is one of my favorite eating events. I love game day fare and while we are certainly going to be enjoying my regular favorites, I wanted something new this year. Guess who came to my recipe rescue again...none other than "The Genius". I told you that last post would come back to haunt me. We now refer to my husband as "The Genius". Well I don't but he can call himself whatever he wants, after all I'm the one who started it. Anyway, he suggested a take on Oysters Rockefeller. I gladly agreed.
After some thought and keeping with my belief that everything tastes better with cheese we decided on a buffalo blue cheese Oysters Rockefeller. Take a deep breath. Breathe! I know, it sounds overwhelming and it should because these little gems are heaven right here on earth. I kid you not. heaven. These will definitely be a part of my regular game day repertoire. Thank goodness there are still hockey game days left. I can't believe I just said that.
Recipe:
12 fresh oysters, shucked
1/2 cup breadcrumbs (I used corn flake breadcrumbs and highly recommend them if you can find them)
1 tablespoon parsley, minced
1 tablespoon celery leaves, minced
1 teaspoon green onions, minced
1/4 teaspoon garlic, minced
1/2 teaspoon lemon zest
1 teaspoon butter, melted
1/2 teaspoon black pepper
1/4 teaspoon salt
blue cheese
Directions:
1. Preheat the oven to 500 degrees.
2. Shuck the oysters and save as much of the liquid as possible. Keep oysters on the largest of the half shells.
3. Place all of the ingredients except the oysters and blue cheese in a bowl and mix thoroughly.
4. Cover the oysters equally with the breadcrumb mixture.
5. Crumble about 1 teaspoon of blue cheese over the breadcrumbs of each oyster.
6. Place the oysters on a baking sheet trying to make sure that they stand upright.
7. Place the oysters in the oven and bake for 6-8 minutes, depending on your oven until the breadcrumbs are golden brown and the cheese has melted.
8. Serve with buffalo hot sauce and lemon wedges.
Tuesday, December 15, 2009
Daring Cooks December Challenge: Salmon En Croute


It's that time again, Daring Cooks time and this time around the challenge was Salmon En Crute, hosted by Simone of Junglefrog Cooking. What's not to like about this dish? Buttery pastry-good, salmon-good, cheese-good. Put them all together and what you have is well, just plain good.
The real part of the challenge was baking with pastry and ideally making your own pate brisee. I've been making my own pastry for a while now so that wasn't a concern. Like I've said before, if I can do it anyone can. If you've never made your own pastry, I have to tell you how easy it is, especially if you have a food processor, which I don't. CAN YOU HEAR ME SANTA??? Food Processor. But until then I make mine with a pastry cutter which just takes a little arm work but is still super simple. When making your own pastry a few key things to consider are, making sure the butter and water are ice cold. Also, only add just enough water so when you pinch the dough it sticks together and make sure you don't over process it. And there you have it, the Salmon En Croute was great. I think it would be a lovely dish to serve for company. If you don't like salmon, the beef equivalent would be a Beef Wellington which was the other option for this Months challenge. I've never made a Beef Wellington but it is definitely on my radar. Thanks Simone for a delicious challenge!
The original recipe can be found here. I chose to follow it exactly as is.
Saturday, November 28, 2009
Oyster Po' Boy Sandwich

My Husband has travelled extensively across the globe but me, not so much. There are many places I want to visit and not surprisingly I yearn for those places primarily because of the food. A few examples are of course Spain, France and Italy but a little closer to home, one day we plan on eating our way across the Southern United States. While I can't wait for real Texas BBQ and Mississippi Mud Pie, I long for Louisiana. Oh ya baby, creole and cajun cooking have a special place in my heart.
Now let's just be clear, I am the furthest you can get from being Southern so before I get into trouble from any of you locals I must say that this is my take on the Po' Boy Sandwich so please don't send me any hate mail about oh, I dunno, putting pickles on the sandwich or something like that. I do know for sure that the bun on a po' boy is of utmost importance. You'll want it to be crusty on the outside and light and airy on the inside. From there, the possibilities are pretty broad; shrimp, softshell crab, catfish, crawfish or in this case, oyster. No matter which filling you choose I can assure you that this is a delicious sandwich. Like you needed any convincing. So, until that glorious day when I find myself in New Orleans, my version of the po' boy will certainly suffice.
Recipe:
1 foot long crusty roll, cut in half
8 freshly shucked oysters
1/2 cup all purpose flour
1/4 cup corn meal
1 teaspoon creole seasoning
2 eggs
2 teaspoons hot sauce
mayonnaise
pickles, sliced thinly (I prefer bread and butter pickles)
shredded lettuce
sliced tomato
oil for frying such as peanut, grapeseed or vegetable oil
Directions:
1. Beat the eggs and hot sauce together.
2. In a separate bowl mix together the all purpose flour, corn meal and creole seasoning.
3. Preheat about 1 inch of oil in a heavy bottomed deep skillet or dutch oven to a temperature of 375 degrees.
4. Dip the oyster in the egg mixture followed by the flour mixture and place the oysters one at a time in the hot oil. Make sure you don't crowd the pan, you may have to fry the oysters in batches.
5. Fry the oysters for about 3-4 minutes or until golden brown. Once they are browned, flip the oysters and fry another 3 minutes or again, until golden brown. Remove the oysters from the oil and drain on paper towel.
6. Slather the bread with a good amount of mayonnaise. Place shredded lettuce on the bottom of the bun, followed by tomato slices, pickles and then the oysters.
Sunday, October 18, 2009
Daring Cooks October Challenge: Pho


October's Daring Cooks challenge just happened to be one of my favorite foods, hosted by one of my favorite food bloggers. Chicken Pho was on the menu courtesy of Jaden from Steamy Kitchen. Jaden's new cookbook came out this month and it is stunning. Last year I was one of the recipe testers for her book and every single recipe I tried was delicious. This Pho is no exception. Pho, which is pronounced "fuh" is a Vietnamese soup that can be made with chicken, beef, shrimp or tofu. It's really the broth and the accompaniments that are the stars of this dish, they are the definition of flavor explosion. If you're feeling under the weather, Pho will surely bring you out of your funk. It is so warm and comforting. You'll notice the complexity of the dish when you read the broth ingredients below. I wasn't kidding about the abundance of flavor.
This month there was a second optional challenge which was chocolate wontons. But in an attempt to hold on to Thanksgiving glory just a little longer, I decided to try a pumpkin pie filling. The wontons were fantastic and I may just substitute them next time for the usual pumpkin pie. Okay, maybe not but I will be making them again very, very soon.
Check Jaden's original recipe here.
Here's my recipe for Shrimp Pho with the pumpkin wonton recipe to follow:
2 quarts shellfish stock, see recipe below
1 lb dried rice noodles (about 1/4″ wide)
1/2 lb raw shrimp, peeled and deveined
1. Cook the noodles according to package directions.
2. bring the stock to a boil.
3. Add the shrimp to boiling stock and cook for 2-3 minutes, or just until the shrimp have turned pink.
4. Ladle the stock into bowls, add the cooked noodles and shrimp and serve with the accompaniments below.
Accompaniments:
2 cups bean sprouts, washed & tails pinched off
cilantro leaves
1/2 cup shaved red onions
lime wedges
Sriracha hot sauce
Hoisin sauce
sliced chili
Garnish the soup to your taste with all of the above ingredients.
Shellfish Stock:
3 lbs seafood shells, such as shrimp, crab and/or lobster
3 quarts cold water
1 lemon, halved
handful of fresh parsley
a couple of sprigs fresh thyme
1 clove garlic, roughly chopped
10-15 black peppercorns
1 large onion, unpeeled and cut in half
3" chunk of ginger, unpeeled
2 tablespoons whole coriander seeds
4 whole cloves
2 whole star anise
2 tablespoons sugar
2 tablespoons fish sauce
small bunch of cilantro stems only, tied in bunch with twine
1. Place ginger and onion on a small baking sheet. The top of the onion should be about 4″ from the oven’s heating element. Set to broil on high for 15 minutes. Turn the onion and ginger occasionally, to get an even char. The skin should get dark and the onion/ginger should get soft. After cooling, rub to get the charred skin off the onion and use a butter knife to scrape the skin off the ginger. Slice ginger into thick slices.
2. Place all of the ingredients in a large stock pot and fill the pot with enough cold water to cover the shells. Bring to a boil
3. Reduce the heat to a simmer, partially cover the pot and simmer the stock for 1 1/2-2 hours, skimming off any foam that comes to the surface of the liquid.
4. Strain the stock through a fine colander or cheesecloth. You may have to strain the liquid a few times to ensure all of the solids are removed.
5. Taste and adjust the broth seasoning with more fish sauce and or sugar.
*You can freeze any unused stock.
Pumpkin Wonton Recipe:
wonton wrappers
1/2 cup pumpkin puree
1/4 cup toasted walnuts* roughly chopped
2 tablespoons sugar
1/4 teaspoon cinnamon
pinch nutmeg
pinch ground ginger
pinch allspice
oil for frying, such as grapeseed, peanut or vegetable
1. Mix the pumpkin puree, sugar, spices and walnuts together.
2. Place 1 teaspoon of filling on each wonton wrapper.
3. Lightly moisten the edges of the wrapper with water.
4. Fold the edges of the wrapper together and pinch the edges to seal.
5. Preheat oil in a deep, heavy bottomed skillet to 350 degrees.
6. Place the prepared wontons in the hot oil and fry for 5-6 minutes, turning occasionally or until golden brown.
7. Remove the wontons and drain on paper towel.
8. Sprinkle the wontons with cinnamon and icing sugar.
*To toast the nuts, place them in a frying pan over low heat. Toast the nuts, stirring frequently for about 8-10 minutes or until the nuts become fragrant. The nuts will burn very easily so keep an eye on them.
Monday, August 24, 2009
Daring Cooks August Challenge: Rice with Mushrooms, Cuttlefish and Artichokes


Okay, okay so I'm a week late. Better late than never right? I must stress that I wasn't late cooking the challenge though, just late in actually posting the results. As usual, I waited until the very last minute to bust out the recipe but bust it out I did. It's an Aries thing that pesky procrastination. Or perhaps it's a human thing, I dunno. I've been meaning to get this up for days now but house guests and fun and life in general got in the way. It happens.
Anyway, the challenge for Daring Cooks this month was a Spanish dish that consisted of Rice with Mushrooms, Artichokes and Cuttlefish and it was hosted by Olga of Olga's Recipes. It couldn't have come at a better time because Paella was on my list of things to make and this is a Paella type dish. This recipe is absolutely delicious. My favorite part was the sauce called "Sofregit." It is essentially olive oil, tomatoes, garlic, bell peppers and onions. The Sofregit adds such freshness to the dish, perfect for Summer. In lieu of finding Cuttlefish (which I couldn't) I went with Olga's other suggestions which were clams, mussels and shrimp. The recipe also calls for a garlic aioli which is to be served on top of the rice. I personally didn't care for it too much but my Husband and Mother-In-Law really liked it so I would encourage you to try it. Overall, Olga's recipe was exactly what I was looking for; simple, fresh and just plain good. So while this challenge couldn't have come at a better time. Here's hoping next Month I will actually be on time.
Click here for Olga's original recipe with step-by-step instructions. This is a traditional Spanish recipe so Olga has some good authentic tips:
My recipe is exactly the same as Olga's except for the following changes:
-Instead of Cuttlefish, I added 1/2 lb shrimp (cleaned, deveined and shelled,) 1/2 lb mussels and 1/2 lb clams. The shellfish was added to the pan near the end of the cooking time, covered with a lid and steamed for about 10 minutes or until the mussel and clam shells open. Remember to discard any mussels or clams if the shells didn't open after you have cooked them.
-Also, I squeezed half a lemon over the final dish and sprinkled it with 1/4 cup chopped cilantro.
Tuesday, July 14, 2009
Daring Cooks July Challenge: Cod Poached in Butter with Powdered Flavors


When I first read this month's Daring Cooks challenge I was a little skeptical. It seemed way out of my element and not my style at all. I suppose that's why they call these things a challenge, hello! The challenge for July was based on Molecular Cuisine and was hosted by Sketchy from Sketchy's Kitchen. I have to take the time to thank Sketchy for taking me out of my comfort zone because it turns out I loved it!
The entire time I was drying and grinding the ingredients I kept saying, "I can't believe how fun this is!" While drying the herbs, fruit and vegetables takes some time, it is so worth it just for the aroma that filled my house alone. It also opened my eyes to the possibilities of drying food for preservation. Once I searched for dried cherries in about four different stores with no luck. Something tells me I'll be drying my own! When I dried the cilantro, it was nothing like the dreary green dried herbs I have in my pantry. It was bright, fragrant and so flavorful. Who knew? I had a great time with this challenge and it was a challenge for me. I have never eaten this way or even considered cooking in this style. So thank you Sketchy for pushing me to try something new. And now please excuse me while I go buy myself a food dehydrator.
Click here for Sketchy's original recipe and tutorial. The tutorial will show you how to poach the fish in a Beurre Monte (butter mixture.)
Here are my Recipes for the Powdered Flavors I used:
zest of 2 limes
1 bunch cilantro
1 mango, sliced as thinly as possible
1 red onion, sliced as thinly as possible
10 small red chilies, cut in half and seeds removed
1 small coconut, finely grated
Preheat the oven to 200 degrees. All of the ingredients will have to be placed in a single layer. Line your baking sheets with parchment paper. Place all of the ingredients on the baking sheets. Place the baking sheets in the oven and refer to the following cooking times:
*Lime zest-20-30 minutes, or until the zest feels dried.
*Cilantro-30 minutes, flipping half way through. After 30 minutes, crumble the leaves and stems with your fingers as much as possible, return to the oven and bake another 20 minutes or until the cilantro is completely dried.
*Mango-bake for anywhere from 4-5 hours, flipping the mango a few times.
*Red Onion-bake for approximately 2-3 hours, flipping the onions a few times.
*Red Chilies- bake for 2-3 hours or until the chilies are completely dried.
*Coconut-bake for about 2 hours. Watch carefully that the coconut is drying and not browning.
The idea with the ingredients is that they become dried enough that we can turn them into powders. Drying the ingredients in a food dehydrator would be optimal but the oven works well too. When all of the ingredients are dehydrated, place them separately in a coffee grinder and grind them into a fine powder. To make the powder even smoother and to remove any lumps, run the powders through a fine meshed sieve.
You will likely have leftover powders. Trust me, you'll be happy about that.
Wednesday, July 1, 2009
Shrimp Alfredo (and a week of Eating Down the Fridge)

Well, yesterday was day 7 of the Eating Down the Fridge challenge. And although the fridge and freezer are looking cold and bare, and you can hear an echo in my pantry, I'm not stopping here. I have enjoyed this challenge immensely and will be exercising this theory on a regular basis. Something I realized while participating in Eating Down the Fridge is that while I am not a wasteful person to begin with, I can do better, much better.
The week went a little like this:
Day 1-Soba Noodles stir fried with red peppers, fried tofu, nappa cabbage and cilantro in a simple soy, garlic and ginger sauce
Day 2-Vietnamese Summer Rolls
Day 3-Beef Fajitas
Day 4-Coconut Shrimp
Day 5-Chinese Chicken Salad
Day 6-Lettuce Wraps
Yesterday's, Day 7, was Shrimp Alfredo. Not a bad week of eating if you ask me. I didn't miss shopping at all and it really forced me to get creative and be mindful of what I was eating. Overall Eating Down the Fridge was an excellent experience. I don't know what tonight's dinner will be but that's all part of the fun of it and I can really get used to this not running out to the store everyday thing.
P.S. Happy Canada Day to all my fellow Canadians!
Shrimp Alfredo Recipe:
12 shrimp, shelled, deveined, cleaned and cooked (grilled, steamed or sauteed)
1/2 lb spaghetti or linguini
1 cup cream
1 clove garlic, minced
1/4 cup butter
1/2 cup parmesan cheese, grated
salt and pepper to taste
Heat cream, garlic and butter in a large saucepan over medium heat. Lower the heat to a low simmer and stir in the parmesan cheese. Stir the sauce until the cheese has melted into the cream mixture. Once the cheese has melted, season the sauce with salt and pepper to taste. At this point I like to let the sauce cool slightly and place it in a blender pulsing a few times to make the sauce a little smoother. The blender step is not necessary but I prefer the consistency. Cook the pasta according to package directions. Once the pasta is al dente, return the alfredo sauce and cooked shrimp to the saucepan. Reheat the sauce and shrimp, add the pasta and stir everything together. If the sauce is a little thick, simply thin it out with a little of the pasta water or cream. Serve with freshly grated parmesan cheese.
Serves 2.
Sunday, June 14, 2009
The Daring Cooks Challenge-Potstickers


I'm sure most of you have heard of Daring Bakers. If you haven't, they are a group of ridiculously talented food bloggers who are brave enough to participate in baking challenges once a month. That is not me. Yes, I do bake but my baking skill level is fine, definitely not "daring." Daring Cooks on the other hand? Count me in! I recently joined The Daring Kitchen and was thrilled when Jen from Use Real Butter announced our June challenge...Potstickers. I have posted about potstickers before and make them often. However, I always use premade wrappers and in this challenge we had to make our own. Cool. I also usually make my potstickers with ground pork but I loved Jen's shrimp and pork potstickers so I went with that. Good choice on my part, the combination is fantastic. Just to change things up a bit I decided to steam some of the potstickers and deep fry a batch. They were both delicious but the deep fried potstickers looked like little flowers or purses so they win just because.
I'm so happy to be a part of The Daring Kitchen and this challenge was so much fun. I highly doubt I'll ever go back to using premade wrappers again. I was a little concerned about the whole pleating process but after a little practice it's not that difficult. Okay, so mine certainly don't look uber professional but I did it, they all stayed together while cooking and in my world, that equals success! A couple of things to note when making your own wrappers I found is they have to be rolled as thinly as possible. Also, the initial "pinch" is the most important part of pleating. Make sure that first pinch stays together and you're good to go. Finally, don't overfill the wrappers and trust me, you'll want to. Especially when you're getting close to using up all of your filling you will get excited but resist the temptation to overfill. You'll thank me later. With the first challenge down, I can't wait to hear what the next one will involve. Thanks for the inspiration Jen!
Recipe inspired by Use Real Butter: (Jen has a great tutorial on Use Real Butter so click here if you get confused)
Dough: (I had leftover dough which I froze for later use, otherwise simply double the filling recipe.)
2 cups flour
1/2 cup water
Place flour in a mixing bowl. Slowly add the water stirring with a wooden spoon until the dough comes into a ball. You may need to use more or less water so start with less. Once the dough forms a ball, place the dough on a lightly floured surface and knead for about 2 minutes. The dough should be firm and sticky. Cover the dough and let rest for 15 minutes. Cut the dough into 4 pieces. Roll the dough into 1 1/4" strips. Then, cut off 1" pieces of the dough. Shape the pieces into discs and flatten with your hands. Roll the dough into circles, about 3" around. Place about 1 teaspoon of your filling into the center of your dough. Now, if you haven't already, definitely click here to see the pleating process. There is no way I could explain it better :)
Filling:
10 shrimp, raw, deveined
1/4 lb ground pork
3 tablespoons chives, chopped
1 teaspoon fresh ginger, grated
2 cloves garlic, minced
1 teaspoon rice vinegar
1 teaspoon sesame oil
1 teaspoon sweet chili sauce
1/2 teaspoon salt
Mince shrimp very finely. Combine all ingredients in a mixing bowl. I like to refrigerate the mixture for about an hour but it's not necessary. After all of your potstickers are made, heat your pan to medium heat with about 3 tablespoons oil, such as grapeseed or canola. Place your potstickers into the hot oil making sure not to crowd the pan. Fry the potstickers for about 5 minutes or until the bottoms are golden brown. Once browned, VERY carefully add 1/2 cup water water to the pan. Cover the pan and steam the potstickers for about 10 minutes (the water should be bubbling the entire time.) When the water has evaporated, remove the lid and allow the potstickers to fry another 2-3 minutes. Remove from heat and serve. I like to serve the pan fried potstickers with a mixture of soy sauce and rice vinegar with a side of sambal chili sauce.
Alternately, if you want to deep fry the potstickers, heat 3" of grapeseed or canola oil to 350 degrees in a heavy bottom deep skillet or deep fryer. Place the gyoza into the hot oil. Fry on one side for about 8-10 minutes or until golden brown. Flip the potstickers and fry another 8-10 minutes or until golden brown. Remove from the oil and drain on paper towel. Serve with sweet chili sauce.
Makes about 20 potstickers.
Thursday, January 15, 2009
Shrimp Creole

I always have shrimp in the freezer. It is by far one of the most versatile ingredients that doesn't require any planning. Just thaw them in cold water for 15 minutes and you're set. I usually plan our meals ahead for the week but of course, sometimes life gets in the way of plans and that is where frozen shrimp are a lifesaver. One of the easiest shrimp recipes, and a new personal favorite of mine is Shrimp Creole. While this recipe may appear to have a lot of ingredients, it's a little deceptive because the majority of the ingredients are seasonings. I love this recipe for those crazy nights when you have hungry bellies, very little time and no idea what to make.
RECIPE courtesy of Nola Cuisine:
2 lbs. Peeled and Deveined Shrimp, save shells to make Shrimp Stock (I make a big batch of stock and freeze it in small portions.) Alternately, you can use chicken stock or water.
2 Tbsp Butter
1 Tbsp Vegetable Oil
1 Large Onion, finely chopped
2 Ribs Celery, finely chopped
1 small Green Pepper, finely Chopped
2 Tbsp Creole Seasoning
2 Tbsp Tomato Paste
2-1/2 Cups Very Ripe Fresh Tomatoes, Diced (I use diced canned tomatoes)
1/2 Cup Dry White Wine
2 Cups Shrimp Stock (Or chicken stock or water)
2 Tbsp Garlic, minced
2 Bay leaves
Cayenne to taste
Kosher Salt to taste
1 tsp Black Pepper
1 tsp White Pepper
1 bunch Fresh Thyme
2 Tbsp Tabasco
1 Tbsp Worcestershire Sauce
1/2 Cup Green Onions, green tops thinly sliced, white part sliced into 1/4″ thickness
1/8 Cup Flat Leaf Parsley, minced
1 Recipe creole boiled rice
Melt the butter in a large sauce pan with the vegetable oil over medium high heat. When the butter begins to froth add 1/2 cup of the onions. Cook, stirring occasionally, until the onions are golden brown. Add the remaining onions, celery, and bell pepper, reduce the heat to medium and season with 1 Tbsp Creole Seasoning and a healthy pinch of salt. Sweat the vegetables until soft.
Add the tomato paste mixing well, and cook, stirring constantly, until the paste begins to brown, then add the fresh tomatoes and another healthy pinch of Kosher salt, this will help the tomatoes break down. Stir well.
When the tomatoes start to break down into liquid add the white wine, and turn the heat to high until most of the alcohol burns off. Add the Shrimp Stock, remaining Creole seasoning, garlic, bay leaves, black pepper, white pepper, cayenne (to taste), and Thyme. Bring to a boil then reduce to a low simmer. Simmer for 30-45 minutes.
(If necessary at this point thicken the sauce with 1 Tbsp Cornstarch/ 2Tbsp water. Bring to a boil to maximize the thickening power of the cornstarch.)
Add the hot sauce, Worcestershire, and season to taste with Kosher salt. Last chance to re-season your sauce, remember that good cooking is all about proper seasoning. Make your Boiled Rice, and season your shrimp with 1 Tbsp Kosher salt and a pinch of Cayenne.
Tuesday, December 23, 2008
Shrimp Cocktail with Homemade Cocktail Sauce

I'm bringing the 60's back. That's right folks, Shrimp Cocktail! You may ask why, and the answer is simple; there is no other appetizer that is easier to make while being utterly delicious at the same time. I'm a bit of a control freak. I admit it and yes, I am working on it. Well, in all other areas of my life except for the kitchen. I just can't let go. Particularly where entertaining is concerned. That's why I am all for fool-proof appetizers, especially during the frantic holiday season. It doesn't really get more fool-proof than Shrimp Cocktail. All you have to do is boil the shrimp and the cocktail sauce can be made the night before, ideal.
Now, I know many of you have shunned Cocktail Sauce but I personally love it. So I'm including a homemade recipe here because it's far too easy to make at home that there is no need to buy it.
Happy Holidays everyone!
RECIPE:
Shrimp Cocktail:
1 lb raw shrimp, shells on, deveined
2 TBSP Old Bay Seasoning
1/2 lemon
Bring a large pot of water to a boil. Place the shrimp, old bay seasoning and lemon in the boiling water. Boil shrimp for 3-4 minutes, or just until pink. Drain the shrimp and place them in the refrigerator until thoroughly chilled. Once chilled, remove the shrimp from the fridge and peel the shrimp, leaving the tails intact. Serve with lemon wedges and cocktail sauce. Optional: Serve the shrimp on a bed of bibb lettuce or crushed ice.
Cocktail Sauce:
1/2 cup ketchup
1 1/2 tsp hot horseradish
couple dashes Worcestershire
couple dashes tobasco
1 tsp lemon juice
Combine all ingredients in a small bowl. Cover and refrigerate.
Monday, November 10, 2008
Beer Battered Fish and Chips

Growing up with Scottish parents meant eating a whole lot of fish and chips as a child, at least once a week, usually more. Naturally, it's one of my favorite comfort meals. We have a great fish and chips take-out just up the street so I have never made it at home. I knew that was going to have to change when a couple of weeks ago, my boyfriend and I bought our first house and in a few days we will be moving far away from the local take-out.
I had to get cracking on my search for a great fish recipe (I already have a tried and true chips recipe.) I didn't have to look any further for the fish than Closet Cooking and Kevin's Beer Battered Fish. Hallelujah, this recipe is fantastic! Dare I say it's even better than our local? I shouldn't, but it is. Now I can move into my new house with the piece of mind that I won't be jonesing for one of my favorite meals.
RECIPE courtesy of Closet Cooking:
Beer Battered Fish:
1 bottle beer
2 cups flour
1 teaspoon baking powder
1 large egg (lightly beaten)
1 pound cod fillets (or halibut, snapper or haddock, cut into serving sized pieces)
salt and pepper to taste
1/2 cup flour (extra for dredging)
oil for frying
Mix the beer, flour, baking powder, salt and egg into a batter in a bowl. Season the fish with salt and pepper. Dredge the fish in the flour and shake off any excess. Dip the fish into the batter, allow the fish to sit in the batter for about 10 minutes. Remove the fish from the batter and gently place in the hot oil. Fry the fish in preheated 375F oil until golden brown, about 5-7 minutes, flipping half way through. Drain on a rack and serve immediately with fresh lemon wedges and homemade Tartar Sauce .
Chips:
*bake on Parchment paper!
2 teaspoons vegetable oil
2 large baking potatoes, scrubbed, about 1 1/2 pounds
1 large egg white
2 teaspoons creole seasoning
Preheat the oven to 425 degrees. Cover the baking sheet with parchment paper and lightly grease the parchment with vegetable oil. Pat the potatoes dry and slice lengthwise into 1/2-inch thick slices. Turn each slice flat and slice again lengthwise into even fries, 1/2-inch thick. In a medium mixing bowl, whisk the egg white until very light and foamy. Add the potatoes and the creole seasoning to the egg whites and toss to coat evenly.
Spread the coated potatoes on the prepared baking sheet, not touching. Bake for 30 minutes, or until golden brown and crispy; halfway through the cooking time, with a spatula, scrape the potatoes from the baking sheet and turn. Carefully remove with a spatula to a large serving plate, or individual plates. Serve immediately.
Sunday, September 21, 2008
New York Style Shrimp Boil

I'm jumping with joy. When I posted this Old Bay Shrimp recipe I was contacted by someone from Old Bay asking if I would like to receive an Old Bay Starter Kit. Well, if you read my last post on Old Bay you won't be surprised when I said, "Heck Ya!" I was expecting a few samples of Old Bay Seasoning and maybe an apron or something so I was shocked when the UPS guy delivered a huge box. So what was in the box you ask? An awesome 12 quart stockpot, an oven mitt, various flavors of different Old Bay Seasonings and a bunch of recipes.
Now, this isn't a review for Old Bay. I'm writing about it simply because I love it so much. This Shrimp Boil was one of the recipes included in the kit and it is fantastic! The recipe was created by Chef Laurence Edelman of the Mermaid Inn Restaurant in New York City and I just made a few changes. It's a great way to use up the last ears of corn you are probably cherishing. I think it would be a perfect dish to serve for a group of people. It's so easy, affordable and of most importantly delicious. Thanks Old Bay!
Note* This recipe makes A LOT so half or third if you're not feeding an army.
RECIPE:
2 bottles Pale Ale
3 cups shrimp or chicken stock (you can also use water)
1/2 cup Old Bay Seasoning
6 ears corn, cut into 2" pieces
4 large leeks, white and light green parts only, washed and cut into 1" rings
2 red chili peppers, seeded and sliced thin or 1/2 tsp red chili flakes
3lbs shrimp, unpeeled, deveined
1 lemon, washed and halved
1 TBSP oil
In a large stock pot, heat the oil over medium heat. Add the leeks and chili and saute for about 5 minutes (don't brown the leeks.) Add the beer, stock and corn to the pot and mix well. Bring the liquid to a boil and cook for 8 minutes. Stir in the shrimp and lemon halves. Lower the heat to medium and cook another 4-5 minutes (just until the shrimp turn pink,) stirring occasionally. Remove from heat and pour everything into a large serving bowl. Serve with crusty bread to sop up the juices.
Subscribe to:
Posts (Atom)


