
After spending 4 months in the hospital and having to endure countless hospital meals I was looking for something super tasty. Enter Oysters Rockefeller. After searching for traditional Osyters Rockefeller recipes and keeping with my belief that everything tastes better cheese I decided on a buffalo blue cheese Oysters Rockefeller. Take a deep breath. Breathe! I know, it sounds overwhelming and it should because these little gems are heaven right here on earth. I kid you not.heaven. These beauties are great for any celebration and they totally hit the spot.
Recipe:
12 freshly shucked oysters
1/2 cup breadcrumbs (I used corn flake breadcrumbs and highly recommend them if you can find them)
1 tablespoon parsley, minced
1 tablespoon celery leaves, minced
1 teaspoon green onions, minced
1/4 teaspoon garlic, minced
1/2 teaspoon lemon zest
1 teaspoon butter, melted
1/2 teaspoon black pepper
1/4 teaspoon salt
blue cheese
Directions:
1. Preheat the oven to 500 degrees.
2. Shuck the oysters and save as much of the liquid as possible. Keep oysters on the largest of the half shells.
3. Place all of the ingredients except the oysters and blue cheese in a bowl and mix thoroughly.
4. Cover the oysters equally with the breadcrumb mixture.
5. Crumble about 1 teaspoon of blue cheese over the breadcrumbs of each oyster.
6. Place the oysters on a baking sheet trying to make sure that they stand upright.
7. Place the oysters in the oven and bake for 6-8 minutes, depending on your oven until the breadcrumbs are golden brown and the cheese has melted.
8. Serve with buffalo hot sauce and lemon wedges.
Showing posts with label appetizer. Show all posts
Showing posts with label appetizer. Show all posts
Friday, April 22, 2011
Blue Cheese Oysters Rockefeller

Wednesday, January 5, 2011
Panko Breaded Shrimp with 3 Dipping Sauces
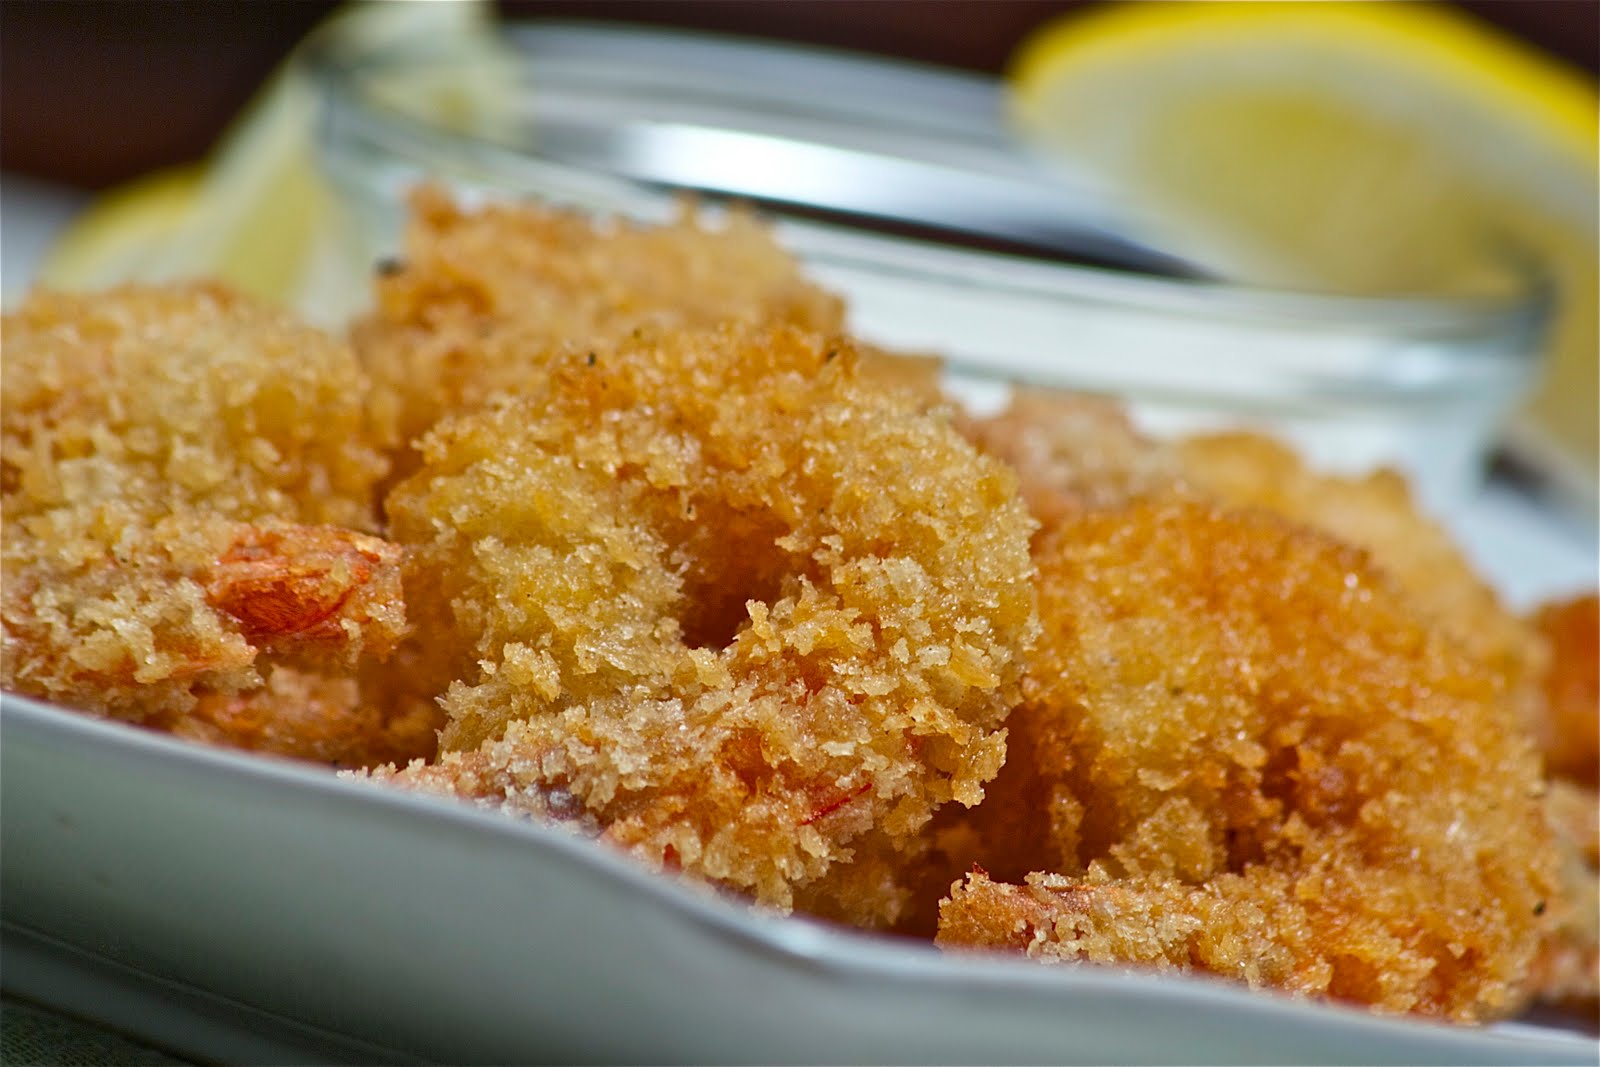
I don't make New Years resolutions because quite frankly, I don't like the pressure and when I tell myself I can't have something, I want it even more. That last quality does not exactly coincide with my major lack of will power especially with guilty food. So while I make myself eat healthy most of the time, when I want something good, I'm gonna have it. And it most often includes something deep fried. Now these shrimp, ooooh baby, these shrimp rock my world. They're sweet, crunchy, juicy and totally hit the spot. When I make them I fry up a large batch and serve them with my 3 favorite dipping sauces (I can never just pick one). That's another of my bad qualities - indecisiveness. But one thing is for sure, I never have to think twice about indulging in these beauties.
Recipe:
20 large shrimp, deveined, cleaned and shells removed leaving the tails on
1 cup flour
1 teaspoon salt
1/2-1 teaspoon black pepper
2 eggs
1/2- 2 cups Panko breadcrumbs (can use regular dried breadcrumbs but they won't be as light and crisp)
1 quart oil for frying (such as vegetable, peanut or grapeseed
Lemon wedges, for garnish
Directions:
1. Heat oil in a deep, heavy pot or fryer on stove. Oil should be 3-4 inches below the top of the pot. Heat oil to 375 degrees.
2. As if working in an assembly line, In one bowl mix the flour, salt and pepper. In another bowl add the eggs and beat lightly. Put the bread crumbs in a third bowl. Working in batches, dredge the shrimp in flour and shake off excess, dip the shrimp in the egg again shaking off excess, then into the bread crumbs to coat thoroughly. When you have 6 breaded add them to the hot oil making sure not to crowd the pan. Let them fry, turning once, until golden brown about 3-4 minutes per side. Remove with a skimmer or slotted spoon. Put on a wire rack lined with paper towel with paper towel and repeat with the remaining shrimp.
Dipping Sauces:
1. Chili Mayo:
1/2 cup mayonnaise
1 teaspoon chili sauce such as sambal oleck (more or less to taste)
1 teaspoon lemon juice
Mix all ingredients together and refrigerate until needed.
2. Homemade Cocktail Sauce
3. Sweet Chili Dipping Sauce
Friday, December 17, 2010
Rosemary Parmesan Savory Shortbread

From the recipe archive: Perfect for the holidays...
I messed up. It's not often that I mess up but I did...Oh man that was fun, I couldn't even keep a straight face typing that because messing up is a huge part of my daily schedule. I am the biggest clutz ever. Surprisingly, I was a ballet dancer for years and years which generally requires grace and the whole clutz thing has caused my ballet teacher mother much dismay. But I play my part and put on the "never trip over over myself" (in public) part quite often.
The other day though, I tripped up in the kitchen making crackers. Tragic, I know. I used way too much butter and they essentialy baked like a shortbread. I was pretty bummed. I was looking for a crisp cracker but you can't always get what you want and sometimes that's a good thing because there are such things as "happy accidents". It seems like happy accidents happen to me when I'm trying too hard to figure things out. I was trying too hard with these crackers when really they wanted to do their own thing. And they did. What I thought was a total failure turned into a perfectly delicious accident. Basically a savory shortbread was the outcome and it was fantastic. So for all of the times that things don't work exactly the way I want them to, thank you kitchen gods. I will continue to appreciate that you probably know better than I do.
Recipe:
8 tablespoons unsalted butter
1/2 cup grated Parmesan
1 1/4 cups all purpose flour
1/4 teaspoon salt
2 teaspoons finely chopped fresh rosemary
Directions:
1. Using either a hand mixer or electric mixer, beat the butter until creamy. Add the remaining ingredients and mix until the dough forms a ball.
2. Place the dough on a lightly floured surface and roll in a log, 2 inches in diameter and aproximately 12 inches long.
3. Wrap the dough in plastic wrap and place in the freezer for 30 minutes or refigerate overnight.
4. Preheat the oven to 350 degrees.
5. Cut 1/4 inch sliced rounds of dough and place on a baking sheet. Bake for about 20 minutes or until lightly browned. Remove from oven and cool completely on a wire rack.
Saturday, March 13, 2010
Beef Kabobs

We were on quite the kabob craze the other day and decided to try out a few different ideas. I know that kabobs might not sound too exciting for many of you but with the different flavours and the endless possibilities, they really are a great option for fast, fun and just plain good food.
Now, with any kabob we are talkin' about a need to be creative. It's kind of hard to do it wrong so do your own thing and have a blast but one little diddy that we tried out the other day is certainly worth trying. Steak, potatoes, tomatoes and ranch dressing, all grilled together. Yes, yes, yes and yes please!
Recipe from recipeland:
4 whole new potatoes, cut in half
1 lb beef sirloin, cut lengthwise into 1/2" strips
8 cherry tomatoes
1/4 cup ranch dressing, divided in half
Directions:
1. Preheat the grill to medium heat. Meanwhile, if using wooden skewers soak them in water for 15 minutes.
2. Bring a saucepan of water to a boil and cook potatoes about 10 minutes or just until slightly tender. Don't overcook the potatoes.
3. Thread the skewers accordion style alternating with the beef, potatoes and tomatoes. Brush with half of the ranch dressing and place the kabobs on the hot grill. Cook for 10-15 minutes or until the beef is nicely browned. Brush the kabobs with the remaining dressing 2 minutes before removing them from the grill.
Sunday, February 7, 2010
Buffalo Blue Cheese Oysters Rockefeller

It's game day! That's right, Super Bowl Sunday is one of my favorite eating events. I love game day fare and while we are certainly going to be enjoying my regular favorites, I wanted something new this year. Guess who came to my recipe rescue again...none other than "The Genius". I told you that last post would come back to haunt me. We now refer to my husband as "The Genius". Well I don't but he can call himself whatever he wants, after all I'm the one who started it. Anyway, he suggested a take on Oysters Rockefeller. I gladly agreed.
After some thought and keeping with my belief that everything tastes better with cheese we decided on a buffalo blue cheese Oysters Rockefeller. Take a deep breath. Breathe! I know, it sounds overwhelming and it should because these little gems are heaven right here on earth. I kid you not. heaven. These will definitely be a part of my regular game day repertoire. Thank goodness there are still hockey game days left. I can't believe I just said that.
Recipe:
12 fresh oysters, shucked
1/2 cup breadcrumbs (I used corn flake breadcrumbs and highly recommend them if you can find them)
1 tablespoon parsley, minced
1 tablespoon celery leaves, minced
1 teaspoon green onions, minced
1/4 teaspoon garlic, minced
1/2 teaspoon lemon zest
1 teaspoon butter, melted
1/2 teaspoon black pepper
1/4 teaspoon salt
blue cheese
Directions:
1. Preheat the oven to 500 degrees.
2. Shuck the oysters and save as much of the liquid as possible. Keep oysters on the largest of the half shells.
3. Place all of the ingredients except the oysters and blue cheese in a bowl and mix thoroughly.
4. Cover the oysters equally with the breadcrumb mixture.
5. Crumble about 1 teaspoon of blue cheese over the breadcrumbs of each oyster.
6. Place the oysters on a baking sheet trying to make sure that they stand upright.
7. Place the oysters in the oven and bake for 6-8 minutes, depending on your oven until the breadcrumbs are golden brown and the cheese has melted.
8. Serve with buffalo hot sauce and lemon wedges.
Thursday, December 10, 2009
Baked Brie with Candied Walnuts and Savory Blueberry Compote

While dining out the other night, one of the appetizers we had was a baked brie with pecans and a blueberry compote and it was to die for. I've always been fond of baked brie (or any cheese for that matter) but I have only ever had it baked in puff pastry. This dish brought the brie to a whole new level and the absence of the rich puff pastry made for a perfect beginning to our dinner.
It's not as if baked brie really needs help in the flavour department but the pecans and blueberries complimented the cheese amazingly. It was so good that I haven't stopped thinking about it. I get like that every so often (always) since all I really think about is food. While I'm eating breakfast I'm thinking about what I'm going to make for dinner. I would say it's a curse and I'm sure my behind and waistline would tell you it most certainly is but I am powerless to it, I've given up, or in, or out depending on how you look at it. Anyway, I knew I had to make this baked brie especially because it's the holidays and I do believe that this would make a perfect appetizer for a dinner party or ummm, like, a regular Thursday night. Either way, here's my interpretation of the dish.
Recipe:
1 wheel brie cheese
1/2 small yellow onion, sliced very thinly
1 cup blueberries, fresh or frozen
1/2 cup water
1 tablespoon sugar
3 tablespoons balsamic vinegar
1/2 teaspoon butter
1/2 teaspoon oil
1/2 cup walnuts
1/3 cup sugar
For the brie:
1. Preheat the oven to 350 degrees.
2. Place the brie on a parchment lined baking sheet and bake the brie for 15-20 minutes.
3. Remove the brie from the oven and allow to cool for about 10-15 minutes before serving.
Serve the brie with the blueberry compote and candied walnuts. (See below)
For the candied walnuts:
1. Toast the walnuts. There are a few ways to do this:
a) Place the walnuts in a skillet over low-medium heat and gently toast the walnuts, stirring occasionally, until they are fragrant, about 8 minutes.
b) Spread the walnuts on a plate and microwave on high heat for 4-5 minutes or until fragrant.
c) Preheat the oven to 350 degrees. Place the walnuts on a baking sheet and toast in the oven for 8-10 minutes or until fragrant.
Whichever way you choose to toast the nuts just be sure to keep a close eye on them as they will burn very easily.
2. In a heavy bottomed saucepan melt the sugar over high heat.
3. Once the sugar has dissolved and is bubbling, add the walnuts and stir immediately.
4. Working quickly, pour the walnut and sugar mixture on a wax paper or parchment paper lined baking sheet and using two forks, separate the walnut pieces. (Don't touch the hot candied walnuts as the sugar will burn you) Allow the nuts to cool.
For the blueberry compote:
1. Heat 1/2 teaspoon oil and half a teaspoon butter in a saucepan over medium heat. Add the onions and saute for about 15-20 minutes or until a light golden colour and they become caramelized.
2. Add the blueberries, water, sugar and balsamic vinegar to the caramelized onions and bring mixture to a high simmer.
3. Reduce the heat to low-medium and simmer the sauce for about 15 minutes or until most of the liquid has been absorbed and the sauce is thick.
4. Set the sauce aside and allow it to come to room temperature.
Saturday, November 7, 2009
Samosa with Cilantro Chutney

I promised you samosas so here we go. Samosas, which are basically stuffed pastries, are one of the best little snacks around. They can be made many different ways, either vegetarian with potatoes and peas or with ground beef or chicken. Either way, they are so satisfying and If you're new to Indian food I would suggest wetting your appetite with samosas. Although the recipe may seem a bit involved, they are fun to make (trust me) and you can adjust the seasonings from mild to spicy, spicy goodness. And then there's the cilantro chutney...I could eat this stuff all by itself. While I adore this chutney with samosas I can't help but wonder what else it would be good with. Any ideas?
Next we'll wrap up the dinner with lamb curry. Even if you think you don't like lamb, I encourage you to give this recipe a try. Or at the very least you can substitute beef, chicken, tofu or chickpeas. That's the beauty of Indian food, it's versatility.
I would recommend watching Manjula's video on samosa making. The video is about 13 minutes long but well worth the watch if you have time. Click here to watch:
Recipe from Manjula's Kitchen:
Dough:
1/2 cup all purpose flour
1/2 tablespoon sooji (semolina flour)
1/4 teaspoon salt
1 1/2 tablespoons oil
1/4 cup minus 2 tablespoon lukewarm water
1. Mix the flour, sooji, salt, oil and salt together to make a soft dough (add more water as needed). knead the dough for about 1 to 2 minutes to make the dough smooth and pliable.
2. Set the dough aside and cover it with damp cloth. Let the dough sit for at least 15 minutes.
Filling:
3 large boiled potatoes, peeled and chopped into very small cubes
1/2 teaspoon cumin seeds
2 chopped green chilies
1 teaspoon coriander powder
1/4 teaspoon garam masala
1 teaspoon amchur (mango powder) (can be found at Indian food stores, omit if can't find.)
1 teaspoon salt
2 tablespoons oil
1/2 cup green peas (frozen)
1. Heat the oil in a frying pan on medium high heat. Test the heat by adding one cumin seed to the oil; if it cracks right away oil is ready.
2. Add cumin seeds green chilies and coriander powder and stir for few seconds.
3. Next add green peas and turn heat to medium and stir until tender.
4. Add the potatoes and stir-fry for about 4 minutes. Stir in garam masala and amchur. Add more salt or amchur according to taste.
5. Let the filling cool to room temperature.
To Make Samosa:
1. Take 2 tablespoons of water and 1 tablespoon of all-purpose flour to make a paste and keep aside.
2. Knead the dough for a minute. Divide the dough into 4 equal parts and make into balls.
3. Roll each ball into 6-inch diameter circles and cut each circle in half.
4. Spread the paste lightly all along the edge of one semicircle. Pick this semicircle up with both hands and fold it into a cone shape. Pinch the side of this cone so that it is completely sealed.
5. Fill the cone with 3 tablespoons of filling. Press this filling down with your fingers. Now close the top of this cone into a triangle shape, pinching the top edge so that it is completely sealed.
Continue filling the rest of the samosas.
6. Heat about 1 1/2" of the oil in a frying pan on medium heat. To check if oil is hot enough place a small piece of dough in oil and dough should sizzle and come to the surface slowly.
7. Place the samosas in the frying pan a few at a time.
8. After samosas are floating on top of the oil turn them slowly. Fry the samosas until the samosas turn a light golden-brown color on all sides. If you use a high heat, the samosa crust will be too soft and not crispy.
Cilantro Chutney:
1 big bunch of chopped Cilantro (green coriander)
1-3 green chopped chilies, start with one and adjust to taste
3 tablespoons of lemon juice
1/2 inch ginger
1 1/2 teaspoons salt
1 teaspoon cumin seeds
1 teaspoon oil
1 teaspoon sugar
Pinch of asafetida (hing) (can be found at Indian food stores, omit if can't find.)
1. Blend all ingredients, except the cilantro, into a paste.
2. Add the cilantro, a little at a time, and blend. If needed, add 2 to 3 tablespoons of water. The water will help in blending.
3. Blend well and add more salt, green chilies, or lemon juice to taste.
Wednesday, November 4, 2009
Vegetable Pakora with Tamarind Chutney

In continuing the rundown of my Indian dinner, one of the appetizers I made were pakoras. If you're not familiar with pakoras, they are an Indian appetizer of vegetables such as cauliflower, onion, eggplant, potato, anything really, that are fried in a chickpea flour (besan) batter. They can also be made with chicken, fish or an Indian cheese called paneer. Basically the Indian version of a Japanese Tempura. AKA, deep fried deliciousness.
Pakoras are one of my favorite Indian dishes in particular onion and cauliflower but one of the best things about Indian food are the chutneys. There are many different varieties of chutney but my favorites are this tamarind chutney and cilantro chutney. I prefer the tamarind with pakoras and the cilantro with samosas. And you guessed it, look forward to samosas with cilantro chutney. But for today, go with the pakoras, you'll be happy you did.
Pakora recipe from Manjula's Kitchen:
1 cup besan (chickpea flour)
3 tablespoons rice flour
1 tablespoon coriander powder
1 teaspoon cumin seeds
2 chopped green chilies
2 tablespoons chopped cilantro
1 teaspoon salt adjust to taste
3/4 cup of water (Use water as needed)
Oil to fry
8 thin slices of cauliflower
1/2 of white onion, sliced into 1/2" pieces
1. Mix the dry ingredients together
2. Add the water slowly to make a smooth batter the consistency of pancake batter. You may need to add more or less water to achieve this.
3. Add the green chilies and cilantro. Mix well.
4. Heat the oil in a heavy bottomed deep skillet to medium heat or about 375 degrees. The skillet should have at least 11/2" of oil. To check if the oil is ready, put one drop of batter in the hot oil. The batter should come up but not change color right away. If oil is too hot the pakoras will not be crispy or if oil is not hot enough pakoras will be greasy.
5. Dip the vegetable slices in the batter one at a time and carefully drop in the skillet.
6. Fry the pakoras in small batches, turning occasionally, for about 8 minutes or until they reach a nice golden brown.
7. Remove the pakoras from the oil, drain on paper towel and serve hot. Note that pakoras are best served right away but can be made ahead and reheated on a baking sheet in the oven at 350 degrees for about 8-10 minutes.
Tamarind Chutney recipe from All Recipes:
1 tablespoon canola oil
1 teaspoon cumin seeds
1 teaspoon ground ginger
1/2 teaspoon cayenne pepper
1/2 teaspoon fennel seeds
1/2 teaspoon asafoetida powder (can substitute onion powder)
1/2 teaspoon garam masala
2 cups water
1/2-1 cup white sugar, start with less and adjust to taste
3 tablespoons tamarind paste
1. Heat the oil in a saucepan with the cumin seeds, ginger, cayenne pepper, fennel seeds, asafoetida powder, and garam masala. cook and stir over medium heat for about 1-2 minutes to release the flavors.
2. Stir the water into the pan with the spices along with the sugar and tamarind paste.
3. Bring to a boil, reduce the heat to a low simmer and simmer the mixture until it turns a deep chocolaty brown and is thick enough to coat the back of a spoon. This should take 20 to 30 minutes. The sauce will be thin, but it will thicken upon cooling.
Makes 1 1/4 cups
Wednesday, September 30, 2009
Egg Rolls

Some of my favorite times in the kitchen are when I have no idea what to make and I have to be crafty. A perfect example of this situation are these egg rolls. The clock was ticking down to dinner time and I didn't have any ideas and even less ingredients to work with. One of the items I did have on hand was ground pork. Seriously, ground pork? What on earth do you make with ground pork? Sure if I had some ground beef to go along with it I could have busted out a meatloaf or some meatballs but just ground pork? Yeesh. But wait-ground pork, cabbage and carrots...I believe Egg Rolls were my only hope. Except I didn't have egg roll wrappers.
Had I not participated in the Daring Cooks Potstickers challenge perhaps I would have been somewhat terrified of making my own egg roll wrappers but during that challenge I must have made about a hundred wonton wrappers so I felt fairly confident that I could make egg roll wrappers. Besides it's not like I had a choice. And I am really happy about that because not only are they very easy to make, much like homemade wonton wrappers, these egg roll wrappers are so much better than store bought. So in conclusion, sometimes an inability to run to the store last minute, a hungry husband on the way home and being forced to be a little creative can result in something pretty cool and very satisfying all around.
Recipe:
Egg Roll Wrappers recipe from Life 123:
2 ½ cups flour
1 teaspoon salt
2 egg whites
½ cup cold water
1 tablespoon cornstarch mixed with 1 tablespoon water to make a paste
1 quart oil for frying, such as peanut, grapeseed or vegetable
1. Mix the flour and salt together.
2. Make a well in the middle and pour in the eggs and water. Using your fingers, gently combine the ingredients to make a dough. If the dough seems a bit too dry, add cold water (a tablespoon at a time).
3. When the dough comes together, knead it for 2 minutes. The dough should be smooth and soft.
4. Cover with plastic wrap. Set aside and let the dough rest for 30 minutes.
5. Divide the dough in half. Keep half covered while you are working with the first half.
6. Roll the dough out on a floured surface. You will need to form a very thin sheet that is 36 x 12 inches.
7. Cut six inch squares. Stack the squares on a plate dusted with flour. Dust the top of each square with flour to keep them from sticking to each other. You can also use parchment paper between the squares.
8. Follow the same instructions for the second half of the dough. You can either freeze them for later use or use them as they are.
Filling:
1/2 lb ground pork
1 cup cabbage, thinly sliced
1 large carrot, julliened
1 teaspoon ginger, grated
1 clove garlic, minced
1 small red chili, seeded and finely chopped (optional)
1 scallion, thinly sliced
1/4 cup cilantro, roughly chopped
1 tablespoon seasoned rice vinegar, if using unseasoned add 1/2 teaspoon sugar to the pork mixture
1. In a large skillet, cook pork until it's no longer pink.
2. Add the ginger, garlic, chili and rice vinegar and continue to cook another 5 minutes over low-medium heat.
3. Remove the pork mixture from the pan and set aside to cool slightly.
4. Add a little oil to the same pan and add the cabbage and carrots to the pan. Cook over medium heat for about 6-7 minutes.
5. Set the cabbage and carrots aside to cool slightly.
Dipping Sauce:
2 tablespoons chili sauce, such as sambal
1 tablespoon honey
1 teaspoon lemon juice
Mix all ingredients together.
Assembly:
1. Preheat oil to 375 degrees In a large heavy bottomed skillet.
2. Place 2 tablespoons of the cabbage and carrot mixture in the center of the wrapper followed by 2 tablespoons of the pork mixture on top of the cabbage.
3. Sprinkle a few of the chopped scallion and cilantro over the pork.
4. lightly brush the edges of the wrapper with the cornstarch mixture, wetting all of the edges.
5. Fold one corner over the filling. Fold the left and right corners towards the center and roll up towards the last corner. Continue rolling the remaining egg rolls.
6. Carefully place the egg rolls into the hot oil. Fry about 5 minutes or until golden brown turning occasionally.
7. Drain the egg rolls on paper towel and serve with dipping sauce.
Friday, September 25, 2009
Potato Latkes

I don't really know what to say about these except to tell you I love these Latkes. I've always really liked latkes and even have a recipe here for a beet and carrot variety but potato has always been my preferred latke choice. There are some bad recipes out there however, and I have been on the receiving end of them more than once. It's not pretty. If you don't squeeze that water out of the potatoes sufficiently it's game over. Or more so it's greasy, boiled potato mounds. See? Not pretty. These latkes though, are fantastic. Not too eggy and nice and crisp. Serve these babies with sour cream or applesauce and you'll be one happy camper.
Recipe adapted from All Recipes:
2 cups potatoes, peeled (russet or yukon golds work best)
2 tablespoons yellow onion, finely grated
1 egg, slightly beaten
2 tablespoons flour
1 teaspoon salt
1/2 teaspoon pepper
pinch nutmeg
1/2 cup oil, such as grapeseed or peanut or vegetable
1. place whole peeled potatoes in ice water for 1 hour.
2. remove the potatoes from the water and using a cheese grater, grate the potatoes (large grate.)
3. Place the potatoes in a cheesecloth or clean tea towel and wring, extracting as much moisture as possible.
4. In a medium bowl stir the potatoes, onion, eggs, flour, salt, pepper and nutmeg together.
5. In a large heavy-bottomed skillet heat the oil until around 350 degrees. Place large spoonfuls of the potato mixture into the hot oil, pressing down on them to form 1/4 inch thick patties. Fry on one side about 5 minutes or just until golden brown, turn and brown on the other. Let drain on paper towels. Serve hot.
*Keep the latkes warm in a 300 degree oven until you are ready to serve. Also, you can make a batch and freeze them by placing the cooked latkes in a single layer on a baking sheet in the freezer. Once the latkes are frozen, store them in a freezer bag. Reheat the frozen latkes in a 400 degree oven for about 10 minutes.
Saturday, May 23, 2009
Lemongrass Beef

While stocking up at my butcher the other day, he recommended we try Bottom Blade steak. He knows how much we love to cook and is always suggesting different cuts. He told us that this particular cut was fantastic when marinaded overnight and then grilled at a high temperature. With this preparation, the meat gets super tender and is so flavorful. Oh, and it retails for $3.99 a pound. Okay Mr Butcher, so, what you're saying is that I can feed 2 (with leftovers) of us a delicious, tender steak for like $4.00? Uh, alright, count me in!
I came home with my total score and began my search for a great marinade. I didn't have to look far, I had the perfect Lemongrass Beef marinade waiting for me in my inbox, thanks to my also obsessed-with-food Cousin-In-Law (is that even a thing?) Either way, thanks Chad! Anyway, have you ever heard of the Happy Food Dance? You know, when you eat something that is so ridiculously good that you start dancing around the kitchen, mid chew. That's how I feel about this Lemongrass Beef. We loved it so much that we made it two nights in a row and let me tell you, there was a fierce dance off up in that kitchen. Both nights. And already, I can't wait to make it again.
Recipe adapted from Cooking.com:
1 lb bottom blade steak
2 lemongrass stalks, tender heart section only, finely chopped
1 tablespoon ginger, minced
3 cloves garlic, minced
1 fresh small red chili pepper, roughly chopped
2 tablespoons brown sugar
1/2 cup soy sauce
1/4 cup rice vinegar
1 1/2 tablespoons fish sauce
1 1/2 teaspoons sesame oil
Cut the beef into 1 1/2" wide strips. Using a meat mallet, pound the beef until it is approximately 1/4" thick. In a sealable container, Combine everything but the beef. Add the beef to the marinade, cover and refrigerate overnight. Remove the beef from the marinade and pat dry with paper towels. Soak bamboo skewers in water for 30 minutes. Preheat the grill to high heat. After the skewers have soaked, thread the beef on to the skewers. Place the skewers on the hot grill and cook for 5 minutes, flip the skewers and grill another 5 minutes. Remove the skewers from the grill and serve.
Tuesday, April 21, 2009
Rustic Mushroom Tart

I came across some beautiful local mushrooms the other day and I couldn't resist, I bought a whole bunch. When I got home I realized that I had just bought a whole bunch and didn't exactly have a plan for them. And so the Mushroom Tart was born. I've seen many recipes for mushroom tarts that include goat cheese, spinach or asparagus, but I didn't have any of those on hand so with my stubborn nature refusing to go back to the store, I decided to experiment with what I did have and the results were fantastic. Here's what I love about cooking compared to baking; you can do your own thing, nothing has to be precise. While I do like to bake, I love to cook. It's so fun to be creative and make things up as you go along and gawd do I hate following rules. So have fun with this recipe. It's so versatile, you could use easily substitute goat cheese, use red wine or balsamic vinegar instead of white wine, leeks would be delicious as well. Also, you can make this tart even easier by using store bought puff pastry. I'd love to hear any of your suggestions!
Recipe:
Pate Brisee (or puff pastry)
Roll out the Pate Brisee into a rectangle about 9'' long (1/4' thick.) Place the dough on a baking sheet, cover with plastic wrap and refrigerate until your filling is ready.
Filling:
3lb mushrooms (chantrelle, oyster, button, portabello), roughly chopped
1 clove garlic, minced
1 small onion, thinly sliced
1 teaspoon sugar
1 tablespoon thyme
1/4 cup white wine, such as a pinot grigio
1/4 cup sour cream
1/2 cup gruyere cheese, grated
salt and pepper to taste
Preheat oven to 400 degrees F. Heat oil in a large saucepan over low-med heat. Saute onions until caramelized, about 30 minutes. Add the mushrooms and garlic and saute for another 15 minutes. Add the wine to the mushrooms and increase heat to med-high. Allow the wine to cook down and be absorbed by the mushrooms, about 5-6 minutes. When the wine has been fully absorbed, remove the pan from heat. Stir in the thyme and sour cream. Remove your pastry from the fridge and spread the mushroom mixture over the surface of the dough, leaving a 1" edge on all sides. sprinkle the cheese over top of the mushrooms. Fold the 1" edge over the mushroom mixture, pinching the dough down as you work your way around the tart. Place the baking sheet in the oven and bake for about 30 minutes or until the pastry is nicely browned. Be sure to check on the tart while it's baking because with all of the butter in the Pate Brisee, it can burn easily. Remove from oven, allow to cool on a rack for about 5 minutes. Cut the tart into squares and serve.
Friday, March 20, 2009
Olive Tapenade

I've never met an olive I didn't like. Okay I should say love, like love, love. I know, you're thinking if you love olives so much, why don't you just marry one? And if I weren't a recently married woman, I might just consider it. When you have a love affair with olives like I do, it's highly probable that you often find yourself with far more in the fridge than two people could possibly eat. So what do you do when you have 5 tonnes (okay, a couple of jars) of olives kicking around? Well you invite some people over and make an olive tapenade, of course!
Perhaps the most delicious and easiest appetizer around is olive tapenade with crostini or crackers. If you're wondering what crostini is, it's toasted bread, such as baguette or ciabatta, plain and simple. So we're talking about throwing some olives and a few other ingredients into a food processor, pulsing a few times and there you have it, a fantastic appetizer in 5 minutes or less. This can also be made simply in a mortar and pestle. Olive tapenade is simple to make, healthy and utterly delicious. It really does not get better than that.
Recipe courtesy of Emeril Lagasse and the Food Network:
3/4 lb pitted black olives, such as Kalamata, Nicoise, or Gaeta
3 to 4 oz capers, drained and rinsed
2 anchovy fillets, drained, rinsed and patted dry
2 cloves garlic, minced
1 teaspoon Dijon mustard
1 bay leaf, finely chopped
5 sprigs fresh thyme, leaves finely chopped
3 tablespoons chopped parsley
1/4 teaspoon crushed red pepper
1/2 lemon, juiced
1 teaspoon red wine vinegar
1 tablespoon cognac or brandy
1/2 cup good quality extra-virgin olive oil
Combine all ingredients in the bowl of a food processor and pulse until the mixture is coarsley pureed.
Serve with crusty bread, pasta, crackers or vegetables.
Monday, March 9, 2009
Tying One On

Things have been a little hectic around here but hectic in a very, very good way. My Mom came for a visit and then my Husband's Mom and Ome came to stay as well. Their trips overlapped so we had all three of them staying with us at the same time. Ome hadn't been able to leave home since her stroke and she was so excited to visit. That got us thinking...Ome's wish was to see us get married and who wants to disappoint a beloved 85 year old? Not us, that's for sure, so we upped and got hitched!
Although our engagement was brief, we had been together for six years so it wasn't exactly a rash elopement. The actual ceremony however, came on WAY fast! It was very small with just our Mom's, Ome a photographer and the Bishop. I didn't care much about the details of the wedding, it was more about our marriage and Ome's wish. So, some candles here and there, some flowers, a little mood lighting and music was good enough for me. One of the most important details though, was the food. I knew I wanted to make everything myself and we decided that an array of our favorite appetizers would be perfect. So it went a little something like this:
Onion, Fig and Goat Cheese Tarts
Swedish Meatballs
Vegetable Platter and Onion Dip
Shrimp Cocktail
Garlic Cheese Biscuits
Cheese Platter
Lemon Tarts
Brownies
Chocolate Truffles
and
Raspberry Mimosas to drink. (Recipe to follow)
The evening was beautiful and eloping was one of the best decisions we made. It was low stress and focused on what really matters. Love, family and of course, good food.
Raspberry Mimosa Recipe:
Raspberry puree (made from 1 cup fresh or frozen raspberries pureed in the blender)
Chilled dry champagne or sparkling wine
Place 2 Tablespoons of raspberry puree in the bottom of each champagne flute. Top the glass with champagne.
Serves 4
Friday, March 6, 2009
Shake and Bake Chicken Wings

Chicken Wings are a staple in our house. We eat them often because my Husband is a sports junkie and wings and the game go hand in hand. My favorite way to prepare chicken wings is Hooter's style Buffalo Hot Wings. They are unbelievable. But they're not exactly good for the ol' bod to eat on a regular basis and with amount of wings we consume I had to come up with a back up plan.
I'm not one for low fat alternatives, I just can't get on board. I would rather eat the real thing occasionally than cut the fat. Case in point-I've never met an oven "fried" chicken recipe I liked and don't even get me started on low fat sour cream or worse yet, NO fat sour cream but I did remember liking Shake 'n Bake when I tried it years ago. So I searched for a copycat shake and bake recipe and sure enough I found it at the same place I found my beloved Hooters wings, Robbie's Recipes. These wings almost rival my deep fried first choice. They are fantastic! Bless Robbie and her copycat recipes. On behalf of my arteries and waistline I thank you Robbie, you are my true hero.
Recipe adapted from Robbie's Recipes:
2/3 cup plain breadcrumbs
1 tablespoon all-purpose flour
1 1/4 teaspoon garlic salt
1/2 teaspoon granulated onion
1/4 teaspoon paprika
1/4 teaspoon ground mustard seed
1/4 teaspoon cayenne pepper (optional)
1/2 teaspoon granulated sugar
1 tablespoon vegetable oil
1 - 1 1/2 lbs. chicken pieces
Shake together first 8 ingredients in a large sealable plastic bag. Drizzle oil over dry mixture; seal bag and shake to mix. Shake chicken pieces, 1 - 2 piece at a time, in mixture. Place coated chicken on an ungreased baking sheet. Bake chicken in a 400 degree oven until juices run clear, about 20 minutes for boneless chicken and 45 minutes for bone-in chicken.
Sunday, March 1, 2009
Caramelized Onion Dip

I was skeptical about making my own onion dip because, and don't laugh, I actually really like that stuff they sell at convenience stores. I know, I'm disgusting. But I'm thinking a lot of you secretly like it too because those little containers fly off the shelves. It's okay to admit it, it's kind of liberating. Anyway like I said, I was skeptical but gave it a go because let's face it, that other dip is not only terrible for you, it makes you feel that way too. Hold on to your hats now folks because this onion dip is so much better than your convenience store special! I'm sure you're all gasping in shock, right?
Obviously the best way to enjoy this dip is with potato chips or crackers but go ahead and make yourself a vegetable platter as well because chances are you're going to eat the whole batch in one sitting. At least if you have the veggies, you won't feel so guilty.
RECIPE slightly adapted from Alton Brown and the Food Network:
2 tablespoons olive oil
2 1/2 cups diced onions
1/4 teaspoon kosher salt
1 1/2 cups sour cream
1 cup mayonnaise
1/4 teaspoon garlic powder
1 tsp sugar
1/4 teaspoon ground white pepper
1/2 teaspoon kosher salt
In a saute pan over medium heat add oil, heat and add onions and salt. Cook the onions until they are caramelized, about 30 minutes. Remove from heat and set aside to cool. Mix the rest of the ingredients, and then add the cooled onions. Refrigerate overnight. Stir again before serving.
Wednesday, December 31, 2008
Swedish Meatballs

Everybody likes Swedish Meatballs right? I have even heard of people trekking to Ikea just for the Swedish Meatballs. I'm not kidding. It's like the meatballs have some kind of special powers. Like I said, everyone likes Swedish Meatballs. Which is why they have been served at cocktail parties probably since the beginning of time. I don't know if this an authentic recipe, in fact, I doubt it is. But it's good, really, really good and sometimes that's all that matters. The best thing about serving these for guests is that they can be made the night before and simply reheated the next day. Some might even say that they are better the next day. And as far as I'm concerned, that holds definite special powers.
I wish you all a fantastic New Year full of lots of love, laughter and of course, great food!
RECIPE (courtesy of Alton Brown and the Food Network)
2 slices fresh white bread
1/4 cup milk
3 tablespoons butter, divided
1/2 cup finely chopped onion
A pinch plus 1 teaspoon kosher salt
3/4 pound ground chuck
3/4 pound ground pork
2 large egg yolks
1/2 teaspoon black pepper
1/4 teaspoon ground allspice
1/4 teaspoon freshly grated nutmeg
1/4 cup all-purpose flour
3 cups beef broth
1/4 cup heavy cream
Directions
Preheat oven to 200 degrees F.
Tear the bread into pieces and place in a small mixing bowl along with the milk. Set aside. In a 12-inch straight sided saute pan over medium heat, melt 1 tablespoon of the butter. Add the onion and a pinch of salt and sweat until the onions are soft. Remove from the heat and set aside. In the bowl of a stand mixer, combine the bread and milk mixture, ground chuck, pork, egg yolks, 1 teaspoon of kosher salt, black pepper, allspice, nutmeg, and onions. Beat on medium speed for 1 to 2 minutes. Using your hands, shape the meatballs into 1"rounds. Heat the remaining butter in the saute pan over medium-low heat, or in an electric skillet set to 250 degrees F. Add the meatballs and saute until golden brown on all sides, about 7 to 10 minutes. Remove the meatballs to an ovenproof dish using a slotted spoon and place in the warmed oven. Once all of the meatballs are cooked, decrease the heat to low and add the flour to the pan or skillet. Whisk until lightly browned, approximately 1 to 2 minutes. Gradually add the beef stock and whisk until sauce begins to thicken. Add the cream and continue to cook until the gravy reaches the desired consistency. Remove the meatballs from the oven, cover with the gravy and serve.
Monday, December 29, 2008
Potato Pancakes

If you're anything like me, you have a fridge full of holiday leftovers. I've been eating turkey for 4 days now and I'm seriously over it. Every time I make mashed potatoes I always have leftovers. One of my favorite uses for the mashed potatoes are potato pancakes. I love to make these for breakfast the next morning served with a dollop of sour cream.
I hope you are all enjoying the holiday season. I'm just coming out of my turkey coma. As much as I love turkey dinner, I have to say, I am so happy it's over for another year. Bring on the New Year!
RECIPE (courtesy of Sarah Molten and the Food Network)
2 cups mashed potatoes, chilled in the refrigerator overnight (Simply Recipes has a great recipe for mashed potatoes)
1 large egg, beaten lightly
6 tablespoons all-purpose flour (you may have to use a little more)
11/2 tablespoons grated onion
2 tablespoons chives
Salt and pepper
Vegetable oil, for frying
Directions
Preheat oven to 250 degrees F.
In a bowl combine well the potatoes and the egg, stir in the flour thoroughly, and stir in the onion, chives, and salt and pepper, to taste. The dough should be fairly stiff.
In a large heavy skillet, heat 1/8-inch of the oil over moderately high heat until it is hot but not smoking. Fry heaping tablespoons of the potato mixture, flattening them slightly with the back of the spoon, for 1 minute on each side, or until they are golden brown. Transfer the pancakes as they are cooked to paper towels to drain and if desired, keep them warm on a rack set on a baking sheet in a preheated 250 degree F oven. Serve with sour cream.
Tuesday, December 23, 2008
Shrimp Cocktail with Homemade Cocktail Sauce

I'm bringing the 60's back. That's right folks, Shrimp Cocktail! You may ask why, and the answer is simple; there is no other appetizer that is easier to make while being utterly delicious at the same time. I'm a bit of a control freak. I admit it and yes, I am working on it. Well, in all other areas of my life except for the kitchen. I just can't let go. Particularly where entertaining is concerned. That's why I am all for fool-proof appetizers, especially during the frantic holiday season. It doesn't really get more fool-proof than Shrimp Cocktail. All you have to do is boil the shrimp and the cocktail sauce can be made the night before, ideal.
Now, I know many of you have shunned Cocktail Sauce but I personally love it. So I'm including a homemade recipe here because it's far too easy to make at home that there is no need to buy it.
Happy Holidays everyone!
RECIPE:
Shrimp Cocktail:
1 lb raw shrimp, shells on, deveined
2 TBSP Old Bay Seasoning
1/2 lemon
Bring a large pot of water to a boil. Place the shrimp, old bay seasoning and lemon in the boiling water. Boil shrimp for 3-4 minutes, or just until pink. Drain the shrimp and place them in the refrigerator until thoroughly chilled. Once chilled, remove the shrimp from the fridge and peel the shrimp, leaving the tails intact. Serve with lemon wedges and cocktail sauce. Optional: Serve the shrimp on a bed of bibb lettuce or crushed ice.
Cocktail Sauce:
1/2 cup ketchup
1 1/2 tsp hot horseradish
couple dashes Worcestershire
couple dashes tobasco
1 tsp lemon juice
Combine all ingredients in a small bowl. Cover and refrigerate.
Wednesday, November 26, 2008
Onion Rings

So, after the brilliant success I had with the Beer Battered Fish, I found myself with some leftover batter. I hate to waste anything so it got me thinking of some other things that would be delicious beer battered and deep fried. Ok, sure what wouldn't taste great deep fried? Geez, throw a used tire in the mix and it would probably be good! The first thing that came to my mind was onion rings. After some consideration however, I figured beyond onion rings that zucchini, stuffed jalapeno peppers, shrimp, calamari...(you get the idea,) these would all be delicious. Do you have any other suggestions?
RECIPE:
1 large white onion, sliced into 1/4" rings
1/2 cup flour, seasoned with salt and pepper
leftover beer batter
oil for frying (peanut, grapeseed, canola)
Pour 1" of oil into a cast iron or other heavy bottomed skillet. Heat the oil to 370 degrees. Separate the onion slices into individual pieces. Once the oil is hot, dredge the onion slices into the flour, shake off excess flour and then coat them entirely with the beer batter. Remove the onions from the beer batter and allow some of the batter to fall off. You will most likely have to cook in batches, making sure not to crowd the skillet. Place the slices in the hot oil. Allow the rings to fry for 2-3 minutes (or until golden brown) on one side, flip the rings and fry on the other side for another 2-3 minutes. Remove the rings from the oil and drain on paper towels. Serve hot.
Subscribe to:
Posts (Atom)


